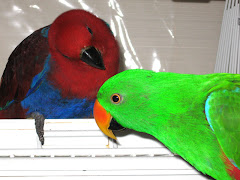
In a way this is pretty crafty. We just bought our birds a new cage! Yay! However, it required putting it together, which my husband did a great job with, AND a new cover for night time. I got the cage from a shop in Queensland called Pet Luvers. A nice gentleman by the name of Michael, was very patient with me as I called every week for almost two months asking if they came in or not.
Saying this cage is HUGE, would be an understatement. Measuring in at 5'4" across, about 6'1" high, and about 2 1/2' deep, it would actually look better either outside or in a much larger house.
This is only three sides of one side of the cage. My husband is a little taller than 6'.
Putting the second side on.
Almost finished, just needs the trays on the bottom, and the wheels.
Cage in place and Jonah exploring
Jonah, enjoying his deck.
"Hmm, this is different"
Our tiny little living room  , so you can see, we need a bigger place!
Now on to the cover.
Fitting the top... I laid the fabric across the top and let it hang to where the sides would hang straight down.
This is the hardest part and it takes the most time to get this part right. This is pinning the front top together... you can see the little pins, then I cut carefully around the corners to make it a little easier to sew and find the right seam line. I also did this on the back, it just makes it a bit more stable and fitted.
Putting on the sides. Yep, I had to stand on a chair  to get the cover over the top.
And h ere is the finished product
Monday, August 18, 2008
For the benefit of my Eclectus friends

Wednesday, August 6, 2008
Does inspiration ever take a break?!
There I was, minding my own business. On Sunday mornings I sit in the sound box at church and project the song words and scriptures from a computer for the congregation. I was keeping up fairly well with the Pastor as she called out the scriptures she was going to read.
Then in happened...
All of a sudden this gorgeous fabric that Janelle has at Pieces to Treasure, came to mind. I swear it was almost tangibly in front of my eyes. Crystal clear. For the next few minutes I had to really focus on my duties, but secretly, I started drawing.
There is a couple in our church that are getting married and their engagement party is this weekend. No, I didn't decide on Sunday to make a quilt for them, well, I did, but I don't plan to give it to them this weekend. I had already bought them some gorgeous towels and a game, but this latest inspiration was so meant for them. So I figured I would just give this to them as well, perhaps for a bridal shower gift or something.
This is the pattern that Janelle
deciphered from my drawing.
The stars of the show, aren't they lucious?! The white swirl was the culprit. You can't really tell here, but the red fabric has red roses on it and the gray has a leafy pattern. You can click on the pictures and they will come up in another window so you can see more detail, but you'll need to hit the back button on your browser window to come back each time.


And here's the progression. You'll notice there isn't a 3rd border listed, I guess I forgot to take a picture

Cutting, cutting
and more cutting


There's still a red binding to go on, but I need to get with Janelle again to get the batting and some final instruction as far as quilting goes. I'm not really sure what I want to do with the quilting, it really needs something, there are some ideas and inspirations wafting around, but I'll probably have to wait till next Sunday morning for them to show up! lol
Saturday, August 2, 2008
A different type of gift box tie
Where in the world has all the ribbon with the wire on the side gone?! I went to four different shops today trying to find it. Each time I was told the shop didn't have it and the sales person didn't know where I could get it. I just thought they didn't want to promote another store! But literally I only found one, but it was ugly and Christmasy. Wouldn't work for a wedding present in August!
Spotlight was my last stop and I just thought I get something that would "do", like satin ribbon or some sort of organza, didn't really know what I'd come against.
Again, no wired ribbon...
When I asked a sales person, she took me to another section of the store where they kept the wedding supplies. They had one or two wired ribbons but neither worked for me. I grabbed some organza and headed to the register. But even before I got out of that aisle, I spotted this great meshy stuff and my wheels were once again turning! And it pretty much matched the box I was using. I didn't want to cover the box with satin ribbon because it's just too pretty, so this mesh really seemed to be the way to go.
It's wrapped around the box lenghthwise and tied. Then I brought the organza ribbon around just toward the end of the box... see where the dark ribbon is laying on the left? It's kinda covering the organza.
Because the contents are yummy, beautiful chocolate brown (but NOT chocolate!), and very soft, I wanted to bring some of that brown out of the box, so I got some small satin ribbon that really matches, just for interest. I got two colours and tied them together.

This is the whole thing all finished. It's very different, but it looks contemporary. I really like it.
The next post will be the wedding card.
More violin accessories
This yet another idea that I can't really claim as my own, the design and production, yes, the idea no. My very gifted violin teacher suggested that we needed an accessories bag that somehow attaches to our cases, simply because shoulder rests are too expensive to lose. I went a step further though and decided I needed something that would hold my books as well.
This project, if done start to finish, with a pattern and directions, would have only taken me about a half hour, it was so simple. I started by going to my favorite crafty shop Spotlight. I looked at leather but the vinyl actually matched case so I went with that instead.
First
 , I had to size the vinyl
I figured out the size I would need for a single folded bag, then hemmed one end. And I have to say at this point, my sewing machine breezed through this project. I had expected it to throw a temper tantrum when I asked it to sew through thicker parts, but it didn't. What a champion machine!
I wanted to make reinforcements for the hardware, more specifically where the eyelets are for the jump rings to go through, I didn't want this to come apart at all. So I came up with this...
I basically freehanded one, then traced it three more times. Then where you see the tiny circle drawn on the top one, I used a punch to punch the hole for the eyelets.


I had to really think about how to attach them so I wouldn't sew them wrong, getting them back off would have been a nightmare, not to mention, inevitably a waste of material because I would have tossed it and started over. I'm sorry I don't have pictures of that step, mostly sorry to myself, cause I might forget how I did it!
This is the hardware I decided on. I liked the antique looking hardware, it just looked nicer. However, I didn't end up using the safety pin things. They didn't work so I tried snaps instead. Unfortunately, I couldn't find the same colour snaps.


I used 14 links on both of the two lengths going from the bag to the case. In hindsight, 14 was probably too many, next time I'll try it fewer.
I started out thinking I'd close the bag with those safety pin things and I thought I would reinforce that with eyelets.

It didn't really work, there wasn't enough give to weave the pins through. So I was stuck with these eyelets and wondered what I could put in them to close the bag, after all, it was all about not losing things! But I just couldn't come up with anything I thought would be nice looking, and user friendly. I had considered velcro, but because the books want to unfold once they're in the bag, there's a lot of strain, so I decided against that as well.

The next idea was snaps. I've never done a snap before, I was actually a little afraid of it at first. But after doing my test, it took a little elbow grease, but it wasn't so hard.
And this is the finished product! I'm not too pleased with the wonky look of the closure, but it works like a dream, and it looks professional.

Friday, August 1, 2008
2 50th Birthday cards and a NOT 50th birthday card
One day I got a phone call from a friend of mine telling me he had a meeting with a business mentor. During this meeting he was discussing a plan of attack for a new business venture, somehow my name and my card making abilities came up. This woman told my friend that she had a couple of very special friends who were turning 50 in the following couple of weeks and she had been looking for nice cards but had no luck finding what she wanted.
So Josh called me and gave me the story and her email address. I wrote a quick email introducing myself and asking her to tell me what she was looking for.
She wanted something gold and blingy with the birthday girls names on them. Normally, I don't do blingy, just too tizzy for me, but I struck a happy medium with these two.
I adore, adore, adore shaker cards and felt this was a perfect opportunity to make a special one.

I first figured out how to print the name on the front of the cardstock using Publisher and my laser printer. When I finally got that right...
I used an aquwash brush to "cut" a square from some silk paper, then I frayed it up a bit.
I then printed out a big 50 on copy paper and cut it out making a template, then traced it onto another piece of cardstock. I thought it looked a bit plain so I found a curly q stamp and used Gold Brilliance ink to do a bit of stamping, and I also applied the stamp pad directly to the edges.
Next, I attached a piece of acetate on the back of that, then the foam tape. I left a bit open at the top, folded a piece of copy paper into a funnel and carefully poured the seed beads in before removing the tape backing to seal the whole thing shut. One last thing I did before sealing it, just for something extra special, I added a tiny dark pink metallic heart in with the beads... which promptly got stuck under a piece of tape. Hmph.
I sat and played with this card for a while, very theraputic.
The next one was done on the same type and colour of cardstock...

I dotted Dimensional Magic to the back of this ribbon stuff very carefully so it wouldn't come through the holes and look all shiny.
The gold beads are on a string and again are attached with Dimensional Magic.
The 50 is the same 50 I used on that other card. (killed two 50's with one template!) I did the next step kinda backwards, but in the end it turned out. I first traced it onto some foam core board then cut it out with my x-acto knife (gotta love those things!) I found my last sheet of Jac paper and put the numbers face down on it and traced around them, then cut the Jac paper, peeled off one side and attached it to the foam core numbers. Then I flipped them over again onto the back of this beautiful gold Japanese paper and traced them again. I removed the other backing from the Jac paper and carefully attached the Japanese paper. Yeah, in some places it wasn't perfect, but the next step took care of that. I took my trusty dusty nail file and gently filed down the paper so it both aged the edges and made them all uniform. In the end they looked professionally made.
I attached them with just regular double sided tape. The card was also printed the same time the first one was.
And who could forget the liner?!


As you can see, I love my leafy Fiskars punch! I just did the front of the card.
Wednesday, July 2, 2008
Pro - Cras - Tin - A - Tion
Can anyone guess what I'm doing now?!
If you guessed procrastinating... DING DING DING DING! You guessed right!

When I went to my last lesson, my teacher suggested something that, at first, I thought a bit strange, maybe even a little eccentric as well, but it settled in my mind as being what should be. She said "violins love luxury, you should get some silk to wrap it in while its in its case". Then she turned around and said "besides that, it keeps small particles of dust from getting on and in it." Now being the sew-er I am, I thought "wrap it? heck I'll make it a luxury bag! Maybe put a bit of embellishment on it, perhaps a draw string with little gold beads at the ends of the strings..." NOW who's strange and eccentric?!
TWO WEEKS LATER...


and my violin had a comfortable new bed! Ta Da!

By the time I got the silk to cooperate and go through my machine, I was really over it, so there is no draw string, there are no beads... but I think I heard an audible sigh when I placed the violin back in its case...
Monday, June 30, 2008
Brand New Project!!
Yep, thats right! I've been looking forward to this project for months. 1 because its for ME, 2 because it looks like it might take a while to get it done, and who knows the longer the project takes, the less money we spend on other projects! lol
 Anyway, to begin with, THIS is the new project. Hopefully it will end up a King size at 102"x102".
The easy way to begin this project would be to get these really cool things called "Jelly Rolls" made by a company called Moda.

Each of these handy dandy little rolls contains 2 1/2" strips of all the fabrics you could need for a project like this, all you'd have to do is cut them down to the smaller pieces you need, and sew 'em together...
In reality, Janelle didn't have a Jelly Roll in stock that had the colors I wanted. I wanted to stay a little truer to the pattern. I liked the earth tone colours in it and since I'm going through a brown phase right now, I asked if I could just get fabric from the bolt. Janelle didn't even hesitate to say yes. It probably cost me more in the end, but at least I got what I wanted and I'll enjoy looking at it and working on it because I like the fabric.
 of course, pictures don't do them justice.
The strips above are actually a lot more chocolate in colour, the flash on my camera just doesn't cooperate much.


These are the fabrics I selected for the little middle squares and the strips between the blocks.
The darker one is more of a plum-y colour.
So after I chose them, I had a LOT of cutting to do. I needed to cut all of my 2 1/2" strips down to 3.5", 5.5", 7.5", and 9.5" strips, then the two colours above needed to be cut to 2" strips, sewn together then cut into 2" wide rectangles. I also needed several little 2" squares of the plum colour. I think I cut for about 3 days... really.
Here are some of the blocks so far with their 3.5 and 5.5" pieces put together. Janelle told me I just needed to mix all the pieces up, close my eyes, pick one and sew it on. That was ok for the 3.5"ers, but as I went to put the 5.5"ers on, I had to actually start planning them a little more carefully. The 7.5"ers and 9.5"ers are going to be tougher I think. There are 64 squares altogether.


So, I'll be posting as I go along, I hope you'll stop back by to check the progress, I'd sure hate to go this alone!